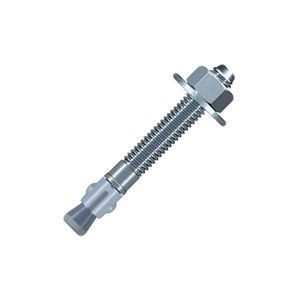
5/8-11 X 12 Wedge Anchor With Nut And Washer, Mechanical Galvanized
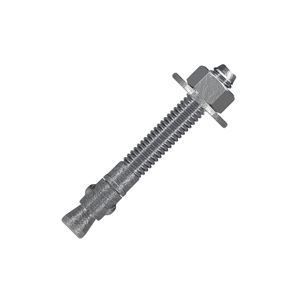
5/8-11 X 12 Wedge Anchor With Nut And Washer, Mechanical Galvanized
Item #: AWEG0621200
Manufacturers:
Product Specification
| Diameter | 5/8 |
|---|---|
| Length | 12 |
| Grade | Carbon Steel |
| With Nut? | With Nut & Washer |
| Material | Steel |
| Finish | Mechanical Galvanized |
| Country of Origin | Unrestricted Origin |
| Weight | 0.962000 |
Dimensional Specifications

| Diameter | Drill Size |
Wrench Size |
Embed Depth |
Critical Edge Distance |
Critical Spacing |
Standard Lengths | Box Qty |
||
| 1/4 | 1/4 | 7/16 | 1 1/8 | 2 1/2 | 1 5/8 | 1 3/4 | 2 1/4 | 3 1/4 | 100 |
| 2 1/4 | 2 1/2 | 3 1/8 | |||||||
| 3/8 | 3/8 | 9/16 | 1 3/4 | 3 3/4 | 2 3/8 | 2 1/4 | 2 3/4 | 3 | 50 |
| 2 5/8 | 3 3/4 | 3 5/8 | 3 1/2 | 3 3/4 | 5 | ||||
| 3 3/8 | 3 3/4 | 4 3/4 | 7 | ||||||
| 1/2 | 1/2 | 3/4 | 2 1/4 | 5 | 3 1/8 | 2 3/4 | 3 3/4 | 4 1/4 | 25 |
| 3 3/8 | 5 | 4 3/4 | 5 1/2 | 7 | 8 1/2 | ||||
| 4 1/2 | 5 | 6 1/4 | 10 | 12 | |||||
| 5/8 | 5/8 | 15/16 | 2 3/4 | 6 1/4 | 3 7/8 | 3 1/2 | 4 1/2 | 5 | 20 |
| 4 1/2 | 6 1/4 | 6 1/4 | 6 | 7 | 8 1/2 | ||||
| 5 1/2 | 6 1/4 | 7 3/4 | 10 | 12 | 10 | ||||
| 3/4 | 3/4 | 1 1/8 | 3 3/8 | 7 1/2 | 4 3/4 | 4 1/4 | 4 3/4 | 5 1/2 | 10 |
| 5 | 7 1/2 | 7 | 6 1/4 | 7 | 8 1/2 | ||||
| 6 3/4 | 7 1/2 | 9 1/2 | 10 | 12 | 5 | ||||
| 7/8 | 7/8 | 1 5/16 | 3 7/8 | 8 3/4 | 5 3/8 | 6 | 8 | 10 | 5 |
| 7 7/8 | 8 3/4 | 11 | 12 | ||||||
| 1 | 1 | 1 1/2 | 4 1/2 | 10 | 6 1/4 | 6 | 9 | 12 | 5 |
| 9 | 10 | 12 5/8 | |||||||
| 1 1/4 | 1 1/4 | 1 7/8 | 5 5/8 | 12 1/2 | 7 7/8 | 9 | 12 | 5 | |
| 9 1/2 | 12 1/2 | 13 1/4 | |||||||
- All dimensions are in inches.
- The published length is the overall length of the anchor. Allow one anchor diameter for the nut and washer thickness plus the fixture thickness when selecting the minimum length.
- Data valid for installation in normal-weight concrete.
Installation

1. Drill a hole in base material using a carbide drill bit the same diameter as the nominal diameter of the anchor to be installed. Drill the hole to the specified embedment depth.

2. Blow hole clean using compressed air. (Overhead installations need not be blown clean.) Alternatively, drill the hole deep enough to accommodate the embedment depth and the dust from drilling.

3. Assemble the anchor with nut and washer so the top of the nut is flush with the top of the anchor. Place the anchor in the fixture, and drive it into the hole until the washer and nut are tight against the fixture.

4. Tighten to the required installation torque.
CAUTION:
•Do not use an impact wrench to set or tighten anchors
•Oversized holes in the base material will make it difficult to set the anchor and will reduce the anchor's load capacity